Gauge Labels
When working with gauges, you can add labels (red highlight below) so that users can easily understand which measures are being compared, and what the value of each measure is in each gauge.

The Gauge Labels dialog is used to customize the following gauge components:
- Main Label: the main label is comprised of both the KPI value and the KPI name.
- KPI Value: this is the value displayed on the gauge (red arrow below); by default, this reflects the value of the measure in the Status drop zone, and is the gauge's "actual value". The value presented here can be changed from the Gauge Value drop-down.
- Secondary Label: this label (yellow highlight) displays the value for the measure in the Target drop zone. It will also display the value for the measure in the Values drop zone if one is given.
- The secondary label is comprised of the title (i.e., Value, or Target) and the corresponding numeric value.

Access Gauge Labels
The Gauge Labels button is exposed from the Component ribbon when working with gauges.

Gauge Labels Dialog
See the previous paragraph for an explanation of the following label types: main label, KPI value, KPI name, secondary label, and title.
Main Label
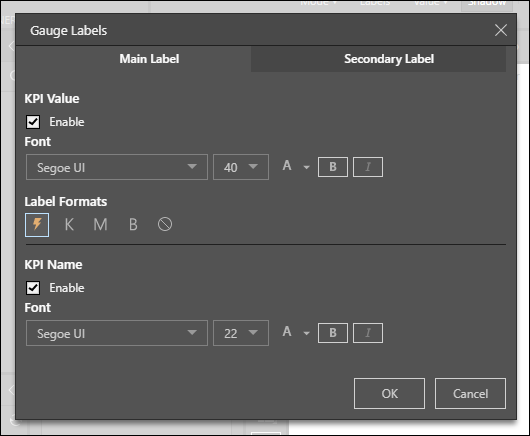
KPI Value
Enable: show or hide the KPI value.
Font: change the font type, size, color, and emphasis (bold or italics).
Label Formats: change the label formats for the KPI value label; this may be auto (lightning bolt icon), thousands (K), millions (M), billions (B), or no formatting (stop icon).
KPl Name
Enable: show or hide the KPI name.
Font: change the font type, size, color, and emphasis (bold or italics).
Under Value, select the value that should appear as the main label. Under Title, use the auto title for the main label, or add a custom title.
Secondary Label

- Enable: show or hide the KPI name.
- Font: change the font type, size, color, and emphasis (bold or italics).
- Background Color: add a background color to the label.
- Title: enable Auto to use the default titles (Status = Status, Value = Value, and Target = Target). Disable Auto to change the title labels.